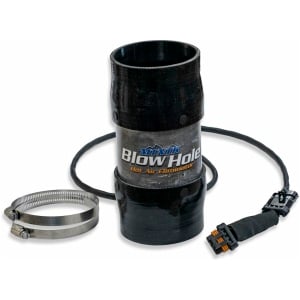
NRP Gen 2 Fox 2.5″ Shock Reservoir High Volume Caps 2 Pack

SKU: NR-NRP11029

$100.00

-

13 in stock

Fueled Cash
Earn $2 Fueled Cash

Lowest Price GuaranteeLowest Price
Guarantee
Free Shipping over $99FREE Shipping over $99

Need Help?

Contact one of our industry experts

Contact us by phone
Contact us by email

Product Details

Description

High Volume End Caps for 2.5″ Gen 2 Nitrogen FOX Shock reservoirs common in the RZR and other UTVs.  Price is for 2 caps.

Fix leaking end caps on the stock FOX Shocks! Includes a standard Schrader valve under a protective cap for filling and adjusting your nitrogen pressure. Even the protective cap is sealed with an o-ring. Long Schrader valve in recessed hole is fully accessible with no-loss nitrogen chucks. When replacing end caps make sure you wear eye protection and clean EVERYTHING! All surfaces must be completely free from dirt and debris. Reservoirs are under high pressure!

Fitment (please refer to the photo of the stock cap prior to ordering to ensure fitment):

Polaris XP 1000 Fox Edition
Polaris XP Turbo
Polaris XP Turbo S
Can-Am Maverick X3
Live Valve Honda Talon 1000R
Live Valve Honda Talon 1000X 4 Seat
Non-Live Valve Honda Talon 1000X 4 Seat – Rear Only

NOTE: To determine whether you have 2.0″ or 2.5″ reservoir endcap size, you simply measure the outer diameter (OD) of the reservoir.

Installation:

  1. Safety glasses should be worn at all times during installation!
  2. Caution! The Reserviors are pressurized with Nitrogen and must be de-pressurized prior to removing the stock cap. Using a needle designed for charging fox shock reserviors, carefully release the nitrogen from the reserviors. If you do not have a needle for this, you can use a 1/16″ or
    1/8″ drill bit to drill through the center rubber portion of the stock finned end cap to release the nitrogen pressure.
  3. After all pressure has been removed, tap the cap into the reservior slightly to expose the snap ring. Remove the snap ring using retaining ring
    pliers. Once removed, pull the stock cap out of the reservior. Using a clean cloth or shop towel, clean the snap ring, the inside of the
    reservior, and the snap ring groove to make sure that all dirt and grit is removed. Denatured alcohol or mineral spirits is recommended to make
    cleaning easier.
  4. Apply a thin layer of grease to the new o-ring prior to installing the new cap. Install the new cap and press firmly into the reservior until the
    snap ring groove in exposed. Once exposed, install the snap ring ensuring that it is fully seated in the groove.
  5. Using a no-loss air chuck and nitrogen supply, re-pressurize the shocks to 200 PSI. At 200 PSI the shocks will work as designed and not cavitate
    from low pressure.

Reviews

There are no reviews yet

Add a review
You must be logged in to post a review Log In

Enthusiasts Also Bought

  • On Sale

    Pro Armor Crawler XG – 32x10R15

    $237.96
  • Switch Pros SP-9100 Switch Panel Power System (8 Switch)

    $659.00

    -

  • Pro Eagle 3 Ton Big Wheel Off Road Jack – Kratos

    $599.99
    Top Seller

    -

  • On Sale

    PRP XC 1″ Extra Wide Suspension Seat

    $485.99

    -

  • Axel Offroad Trail Helmet Matte Black

    Axel Off Road Trail Helmet Matte Black

    $79.00
    Top Seller

    -